Proudly Canadian Owned & Operated
Get Help: 1 (866) 482-2412


If you are stuck trying to get a campaign out the door, navigating the Canada Post Precision Targeter can feel like an incredibly frustrating roadblock. Between mapping glitches and clunky setup screens, launching unaddressed Direct Mail shouldn’t be this difficult. This streamlined, friction-free blueprint is designed to answer some frequently asked questions, and bypass the software headaches so you can launch your hyper-local campaign in minutes.
If you want a seamless setup, follow this step-by-step walkthrough to get your campaign configured correctly on the first try.
To ensure your campaign is tracked correctly and any eligible volume discounts are automatically applied, always use a commercial account.
Navigate to the Canada Post website and sign in with your Business Account Number.
Friction-Fix: Once logged in, verify that your commercial profile is active before opening any mapping tools, or the system may default to high retail rates.
The native software allows you to map out delivery routes visually based on geographic and demographic data.
Access the tool directly through your commercial business dashboard.
Select the option to plan a new unaddressed geographic campaign.
Bypassing a “one-size-fits-all” approach saves your marketing budget by eliminating delivery to addresses that don’t fit your ideal customer profile.
Campaign Basics: Choose your target delivery date or stick to the default timing. You can safely leave budget limits and secondary fee fields blank for now.
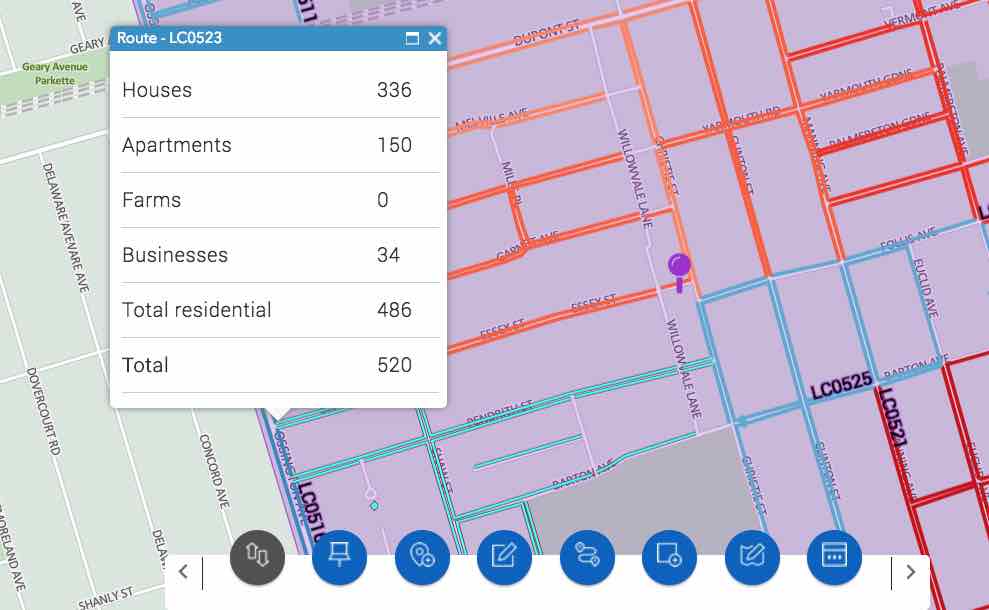
Audience Filtering: Toggle options on or off depending on who you want to reach. You can filter for Houses, Apartments, Farms, or Businesses.
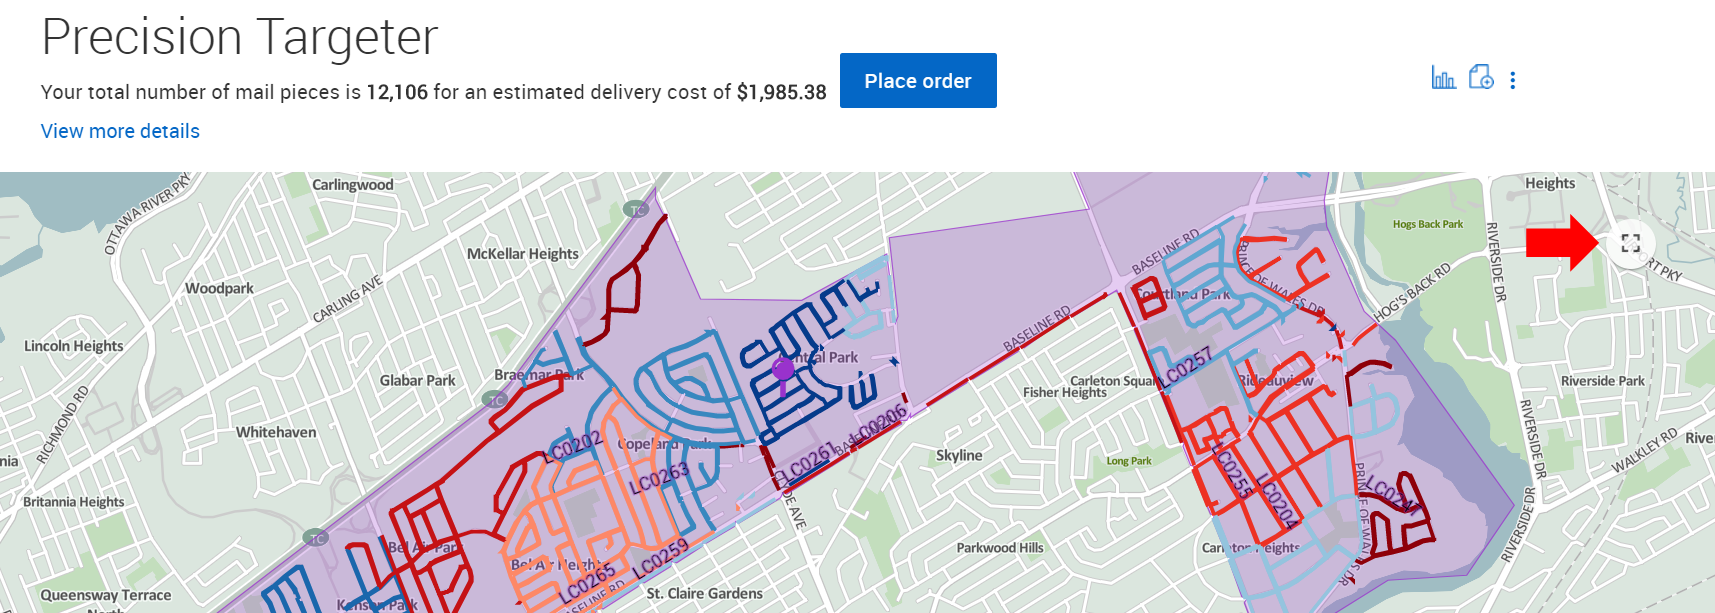
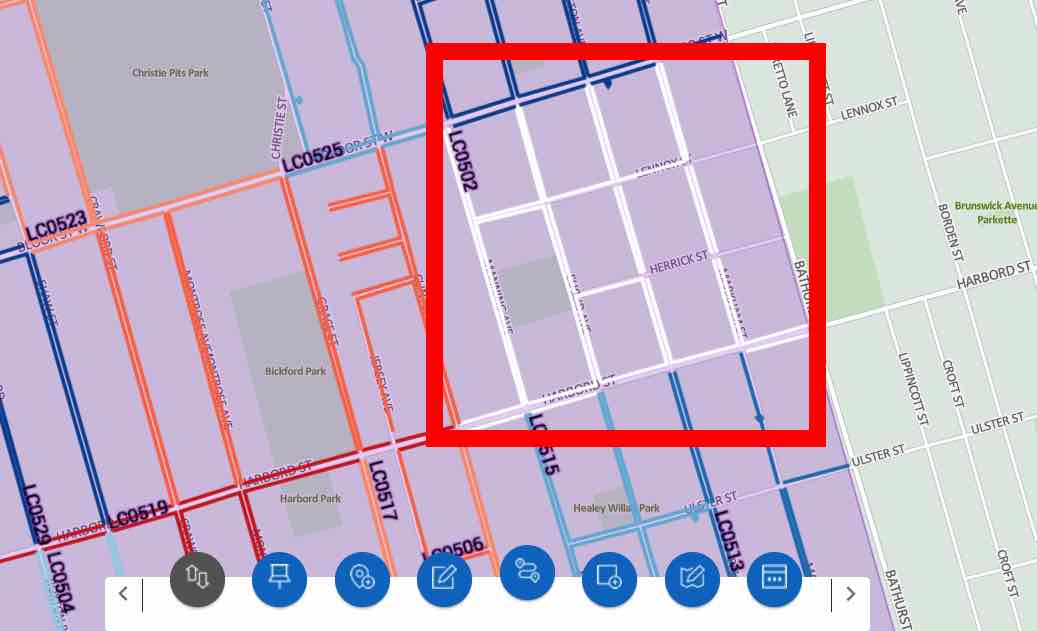
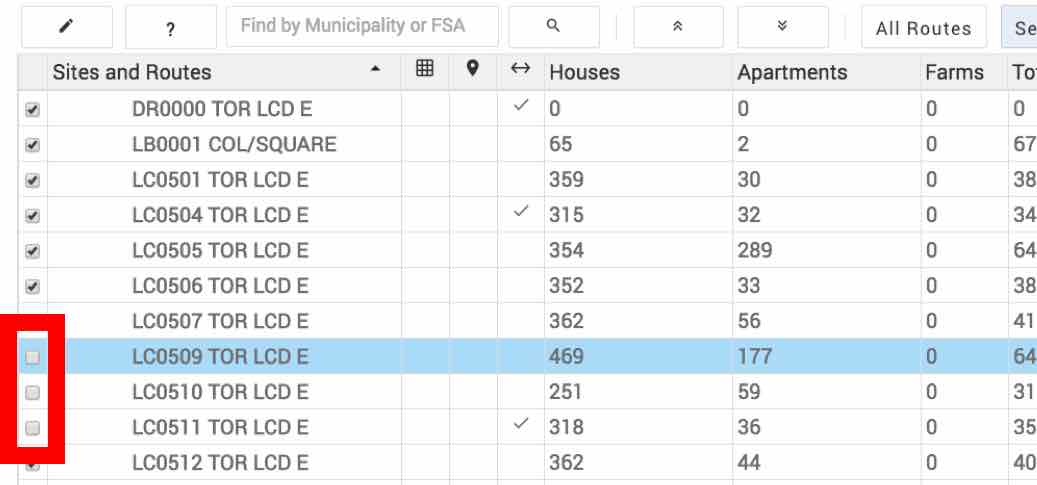
Instead of paying to blanket an entire postal code area, you can select the exact streets closest to your business or recent project. That is part of the added value that Canada Post Precision Targeter offers. Here is how to do that:
Input your target postal code prefix (the first three characters) to generate the map.
Friction-Fix: The visual map can be slow and clunky. Instantly bypass this by switching to the Data View tab at the top right.
Uncheck the global box and select only the specific letter carrier routes (or “walks”) that match your exact target radius. Your piece count and costs will update in real time.
Before checking out, the system needs basic physical specifications for the items being printed and sent.
Name your campaign for easy internal tracking and click Continue.
Bundle Specifications: Input the approximate dimensions of your shipping boxes or bundles. (Don’t overthink this—depot staff use this for general routing, not strict millimeter auditing).
Item Metrics: Input your physical print size and the final quantity required for your chosen routes, then click Apply.
Complete the payment process using your preferred commercial billing method.
Print Manifests: Download and print the generated paperwork package. This includes your commercial receipts and Container Labels.
Final Delivery: Bundle your mail pieces according to the system instructions, attach the labels securely to your containers, and drop them off at your designated local postal deposit hub. Staff will verify your paperwork, and your campaign will hit local mailboxes within days.
Now here are some Frequently Asked Questions about the Canada Post Precision Targeter that can help you understand how to use the tool beyond the basic 6-step process above:
For additional information on sending your Neighbourhood Mail through Canada Post Precision Targeter, please refer to the Neighbourhood Mail Customer Guide at the link below: www.canadapost.ca/tools/pg/serviceoverview/cpnmguides-e.asp
When the neighbourhood mailing data accuracy cannot be guaranteed the tool greys out the date.
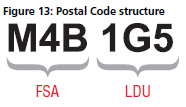
The Postal Code is a six-character uniformly structured, alphanumeric code in the form “ANA NAN” where “A” represents an alphabetic character and “N” represents a numeric character. A Postal Code is made up of two segments: “forward sortation area” and “local delivery unit.” The forward sortation area is a combination of three characters (alpha-numeric-alpha). It identifies a major geographic area in an urban or a rural location. The local delivery unit is a combination of three characters (numeric-alpha-numeric). It identifies the smallest delivery unit within a forward sortation area.
In order to increase the map on the screen, click on  at the top right hand corner of the map.
Once you have completed the 3 steps in the tool, you will be brought to the map view directly. From the map view, click on  at the top right hand corner of your screen to bring you to Data view

Once you are in Data view, click on  at the top right hand corner of your screen to bring you back to Map view.

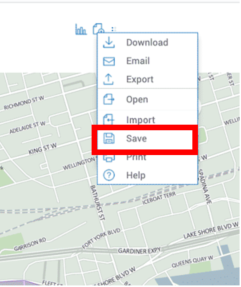
Once you are ready to save your mailing plan, click on the 3 vertical dots at the top right hand corner of your screen  and then click on “save”.
There are 2 ways you can remove routes in Precision Targeter:

Once you are signed in to the Canada Post “Sign in” page, follow these steps: